NO SEW TIE BLANKET CRAFT
To make a no-sew tie fleece blanket, start by laying two pieces of fleece fabric on top of each other with the wrong sides facing in, smoothing out any wrinkles so the edges line up evenly.
Trim the edges if needed, then cut a square (usually about 4–5 inches) out of each corner.
Next, cut strips along all four sides of the blanket, making each strip about 1 inch wide and the same length as the corner square you removed.
Once all the fringe is cut, take one strip from the top layer and the matching strip from the bottom layer, tie them together in a simple double knot, working your way around the entire blanket.
When finished, gently pull on the ties to even them out, and you’ll have a soft, cozy blanket with no sewing required.
MARSHMELLOW STACKS
How to Make a Marshmallow Stack Wood Craft
Step-by-Step Instructions for a Fun and Creative Project
Introduction
Creating a marshmallow wood craft is an engaging and simple activity that's perfect for kids, families, or anyone looking to explore their creative side. This craft uses easy materials—wood blocks and paint—to build imaginative shapes and structures. Follow the instructions below to make your own marshmallow wood craft.
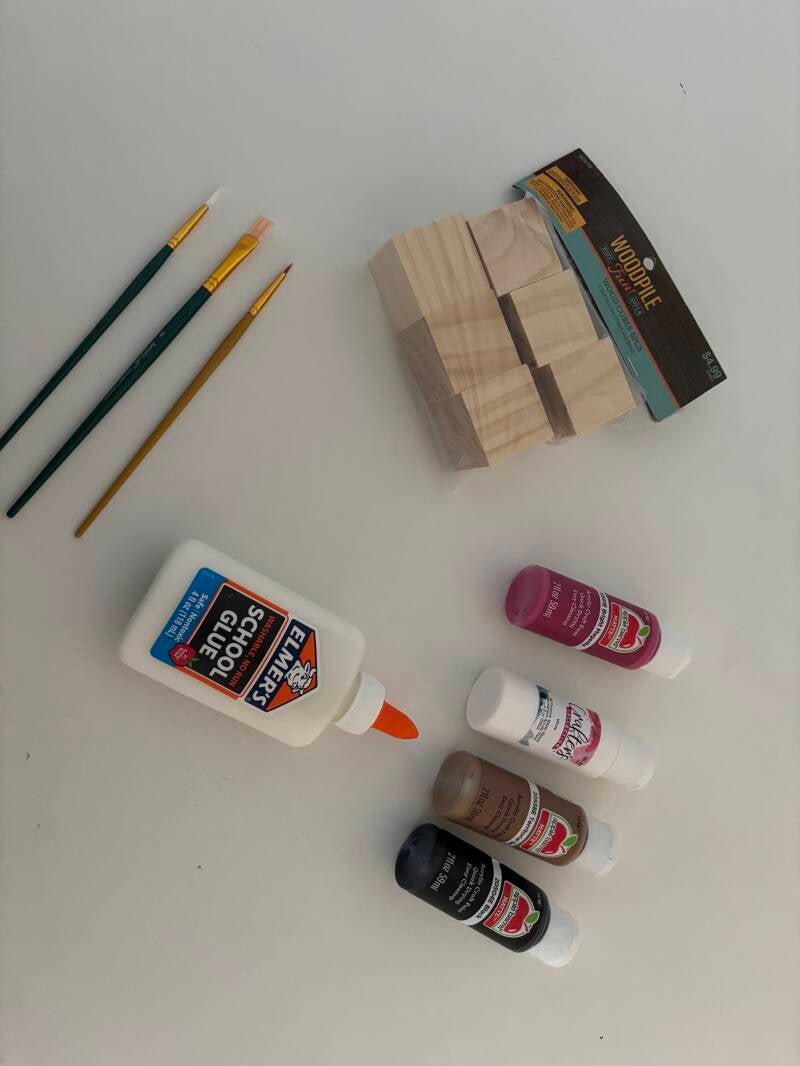
Materials Needed
- Wood Blocks (square or round edged)
- Paint – white, black, tan or brown, pink colors
- Elmers Glue
- Paint Brushes
Instructions
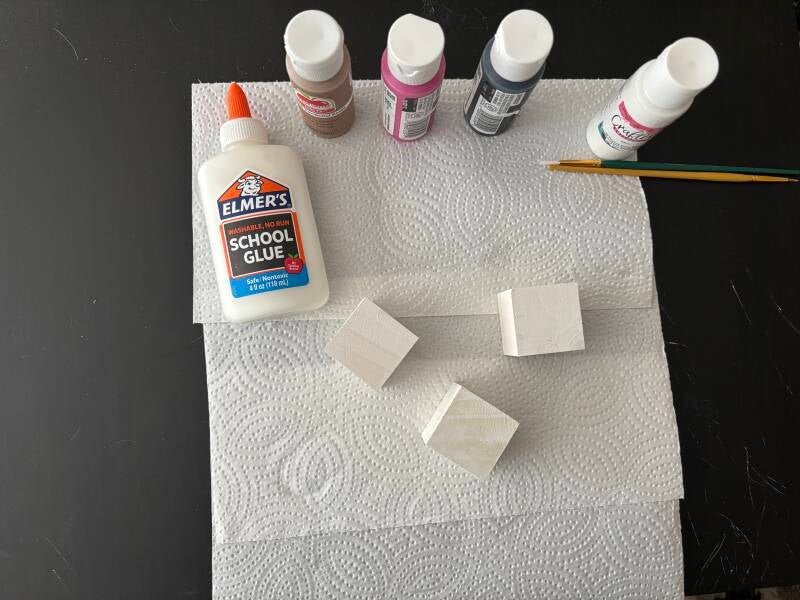
- Prepare Your Workspace:
- Cover your table with newspaper or a disposable tablecloth to keep things clean. Gather all your materials before you start.
- Plan Your Design:
- Decide what you want to the face to be on the marshmallow—a cute smiley face or a wink face.
- Paint each block with 2 coats of white paint as the base.
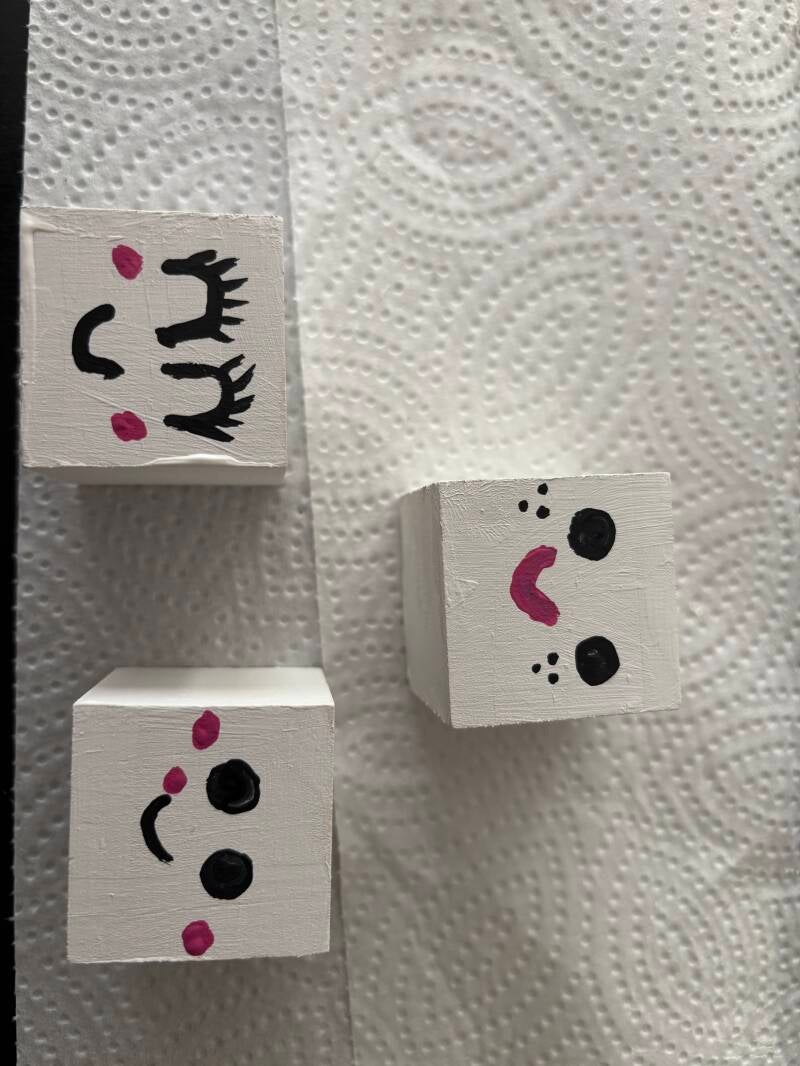
- After you have painted each block white, next work on painting the faces on each of your marshmallows with the black paint period to ensure you get fine details, make sure to use a very fine tipped paint brush when you are painting the faces on each of the blocks.
- After you have painted a face on each of your blocks, take your Elmer’s glue and along the top of each block put a very thin layer of glue, letting it run down a little over the edges and down the front to create a cute melting effect.
- Once the Elmers glue has dried with tan or brown color paint lightly go over your glue so that you can give each block a nice and cute little toasty effect.


Add comment
Comments